The global pandemic era has forced most organizations to rely on virtual meetings and other remote collaboration tools to carry on with operations. With security concerns around Zoom meetings and other platforms, Microsoft has established Teams as the trusted remote operations resource for business.
Microsoft Teams, which fully integrated with the MS Office 365 suite, is a central communication and collaboration hub that enables remote teams to chat, meet, call one another, and collaborate on documents while working from anywhere with an internet connection.
New to Microsoft Teams? The quickest way to put your best foot forward is to learn how to host a Microsoft Teams’ virtual meeting and how to share your screen in that meeting. These simple but incredibly useful tools will position you as remote work savvy. Take 10 minutes to master these tools and no one will know that you’re a beginner!
How to schedule a virtual meeting in Microsoft Teams
Microsoft Teams is a great platform for secure virtual meetings with people inside and outside of your organization. There are several ways to schedule a meeting in Teams. Keep reading for one simple way to get started. Before you dive in, we recommend using earbuds or headphones to prevent an echo.
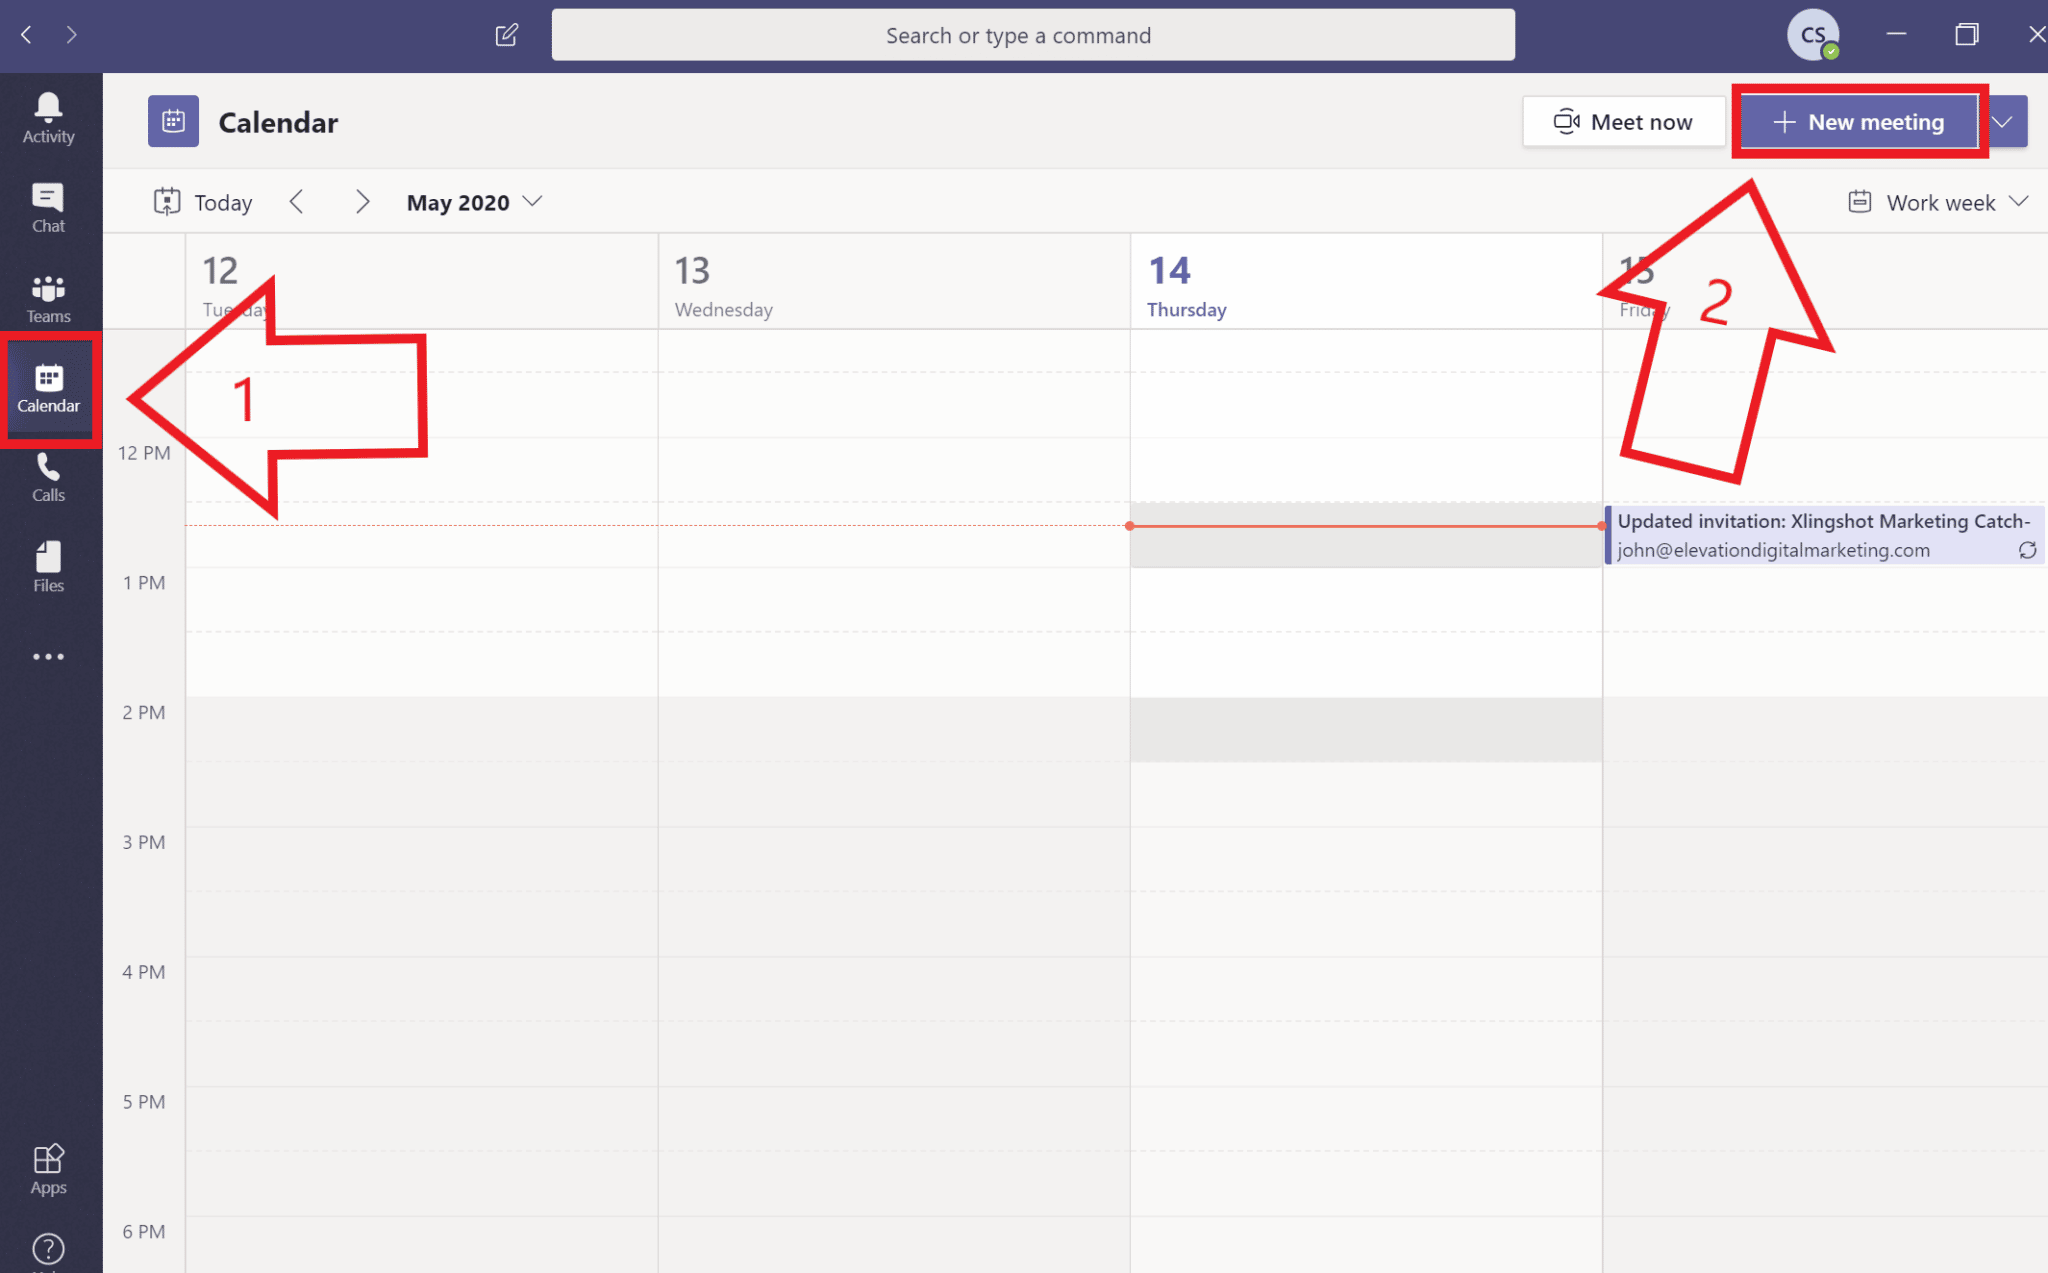
- Once Microsoft Teams is open, click on the calendar icon on the left-hand side.
- Then click “New Meeting” in the top right corner.
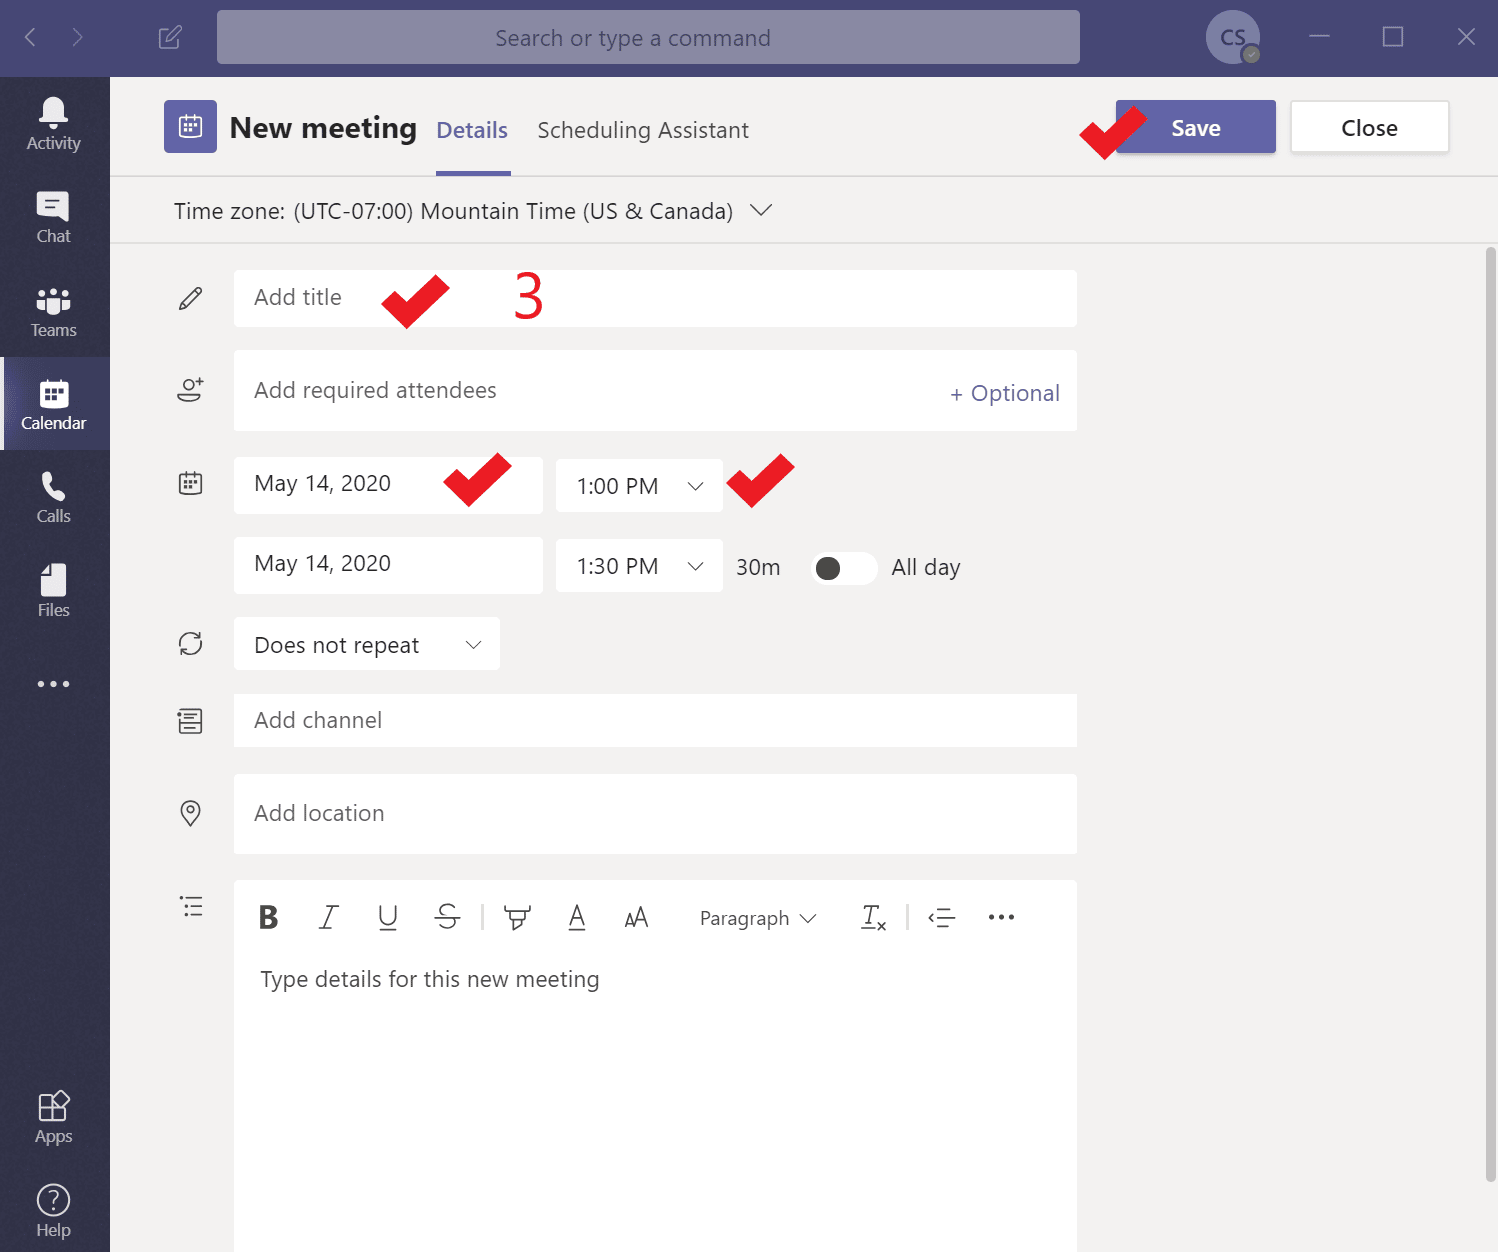
3. A “New meeting” screen will appear. Fill in your meeting details. The basic required fields are check-marked in the image below, feel free to fill in more details, including required and optional attendees. After you have filled in the details, click Save in the upper left corner.
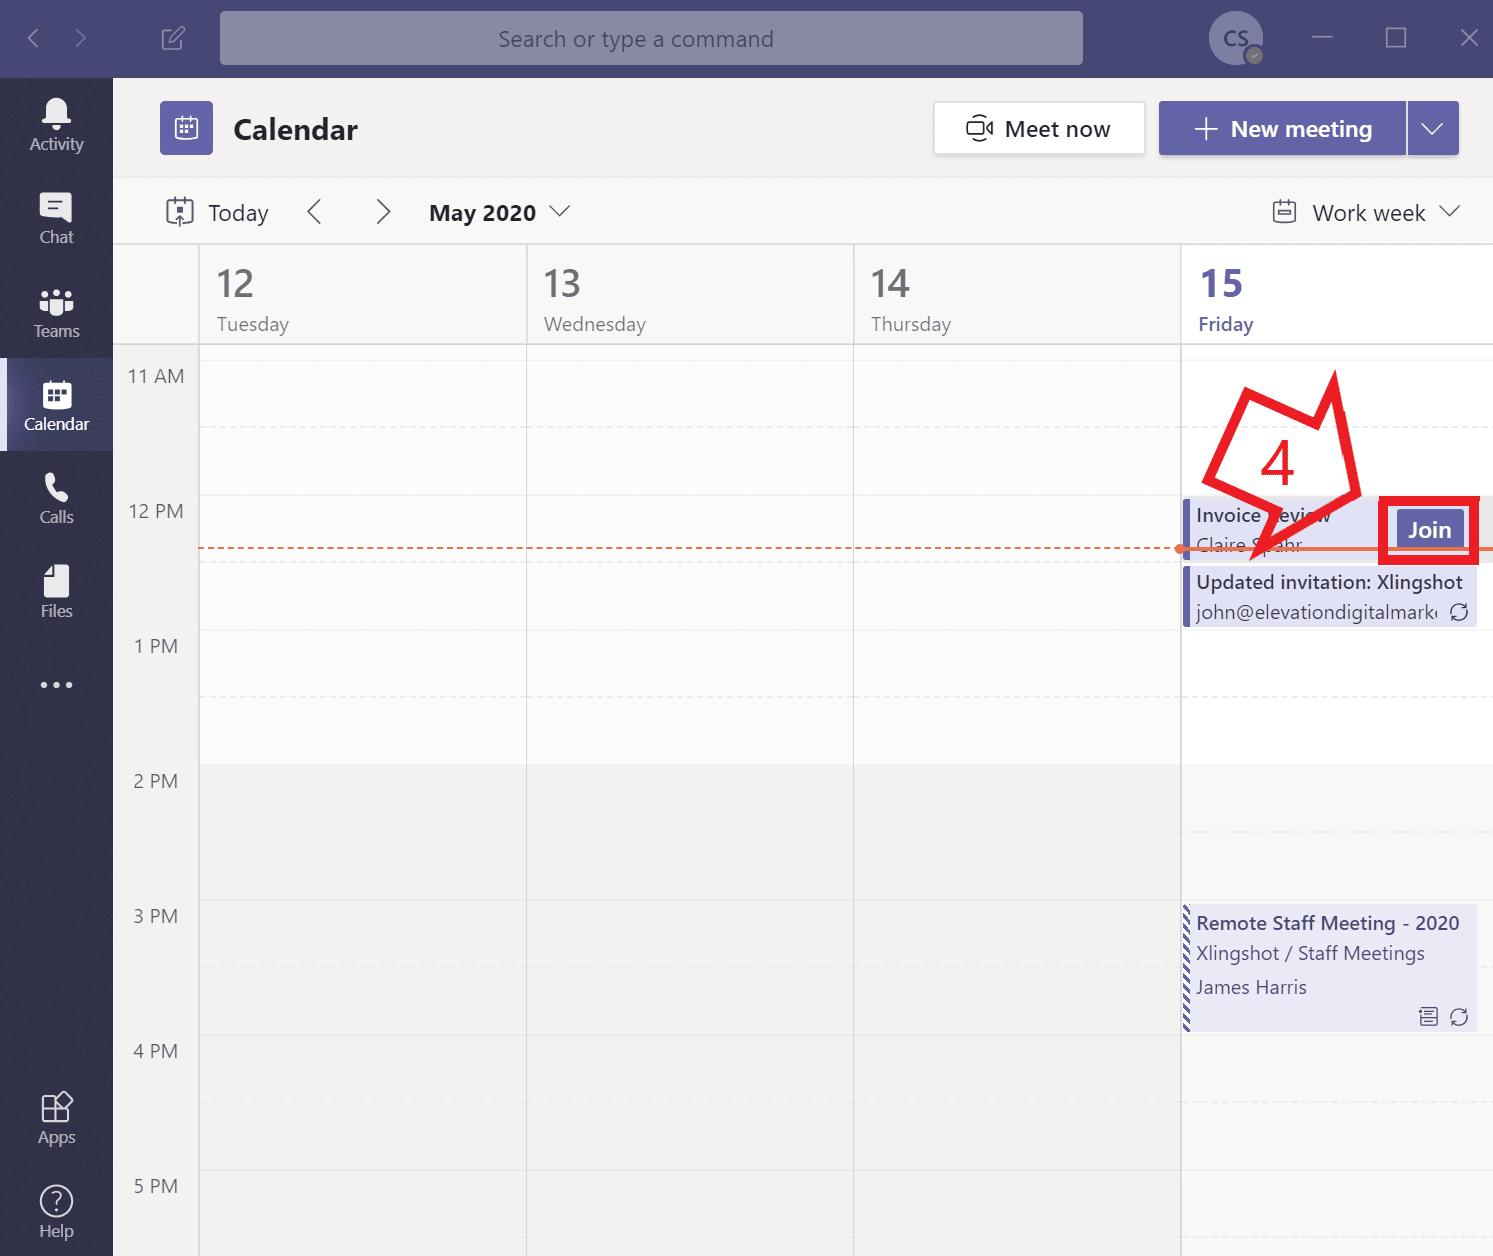
4. When it is time to join the meeting, return to your calendar to find the meeting block and click “Join.”
5. Select whether you want your camera on or off. (You can always start with it off and then turn it on after joining the meeting.)
6. Select whether you want your microphone on or off. (It’s a matter of preference; some users prefer to mute themselves unless they are talking, others prefer to keep the mic on the whole time.)
7. Click “Join.” ( Remember to use headphones or earbuds to prevent an echo.)
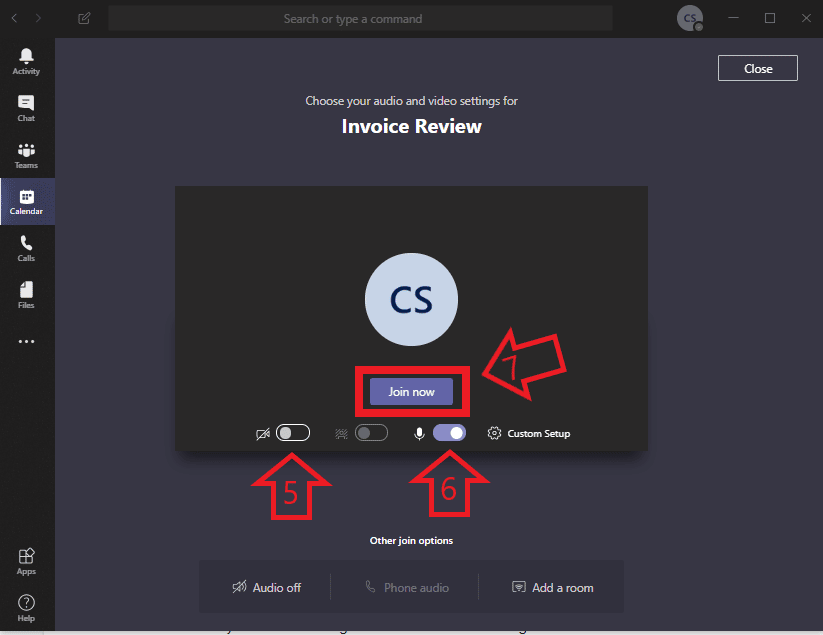
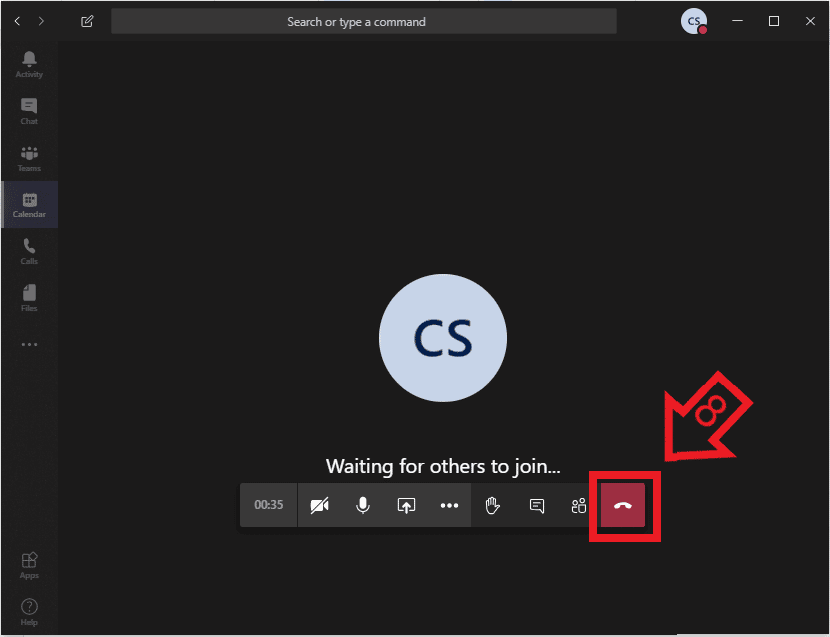
8. When you’re ready to leave the meeting, move your mouse around on the screen and your settings buttons will appear. Click the “hang up” button on the right side.
This is just one way to do it. Microsoft has online resources to learn more about other ways to schedule a meeting in Teams; click here for written instructions, click here for a video tutorial.
Did this help? If you would like more of these Microsoft Teams tutorials, subscribe to our newsletter.
How to Share Your Screen in Microsoft Teams
Now that you can host a Microsoft Teams meeting, let’s move on to screen sharing; it will be your new favorite skill. Screen sharing is an especially handy tool because of the clarity and understanding that visual presentation brings to any form of communication, especially remote communication. It’s great to use with coworkers, for troubleshooting technical issues, when reviewing a contract or invoice with clients; the possibilities are endless.
Microsoft Teams offers a plethora of options in all of its functions, including screen sharing. Here are some simple, step-by-step instructions for one easy way to get started.
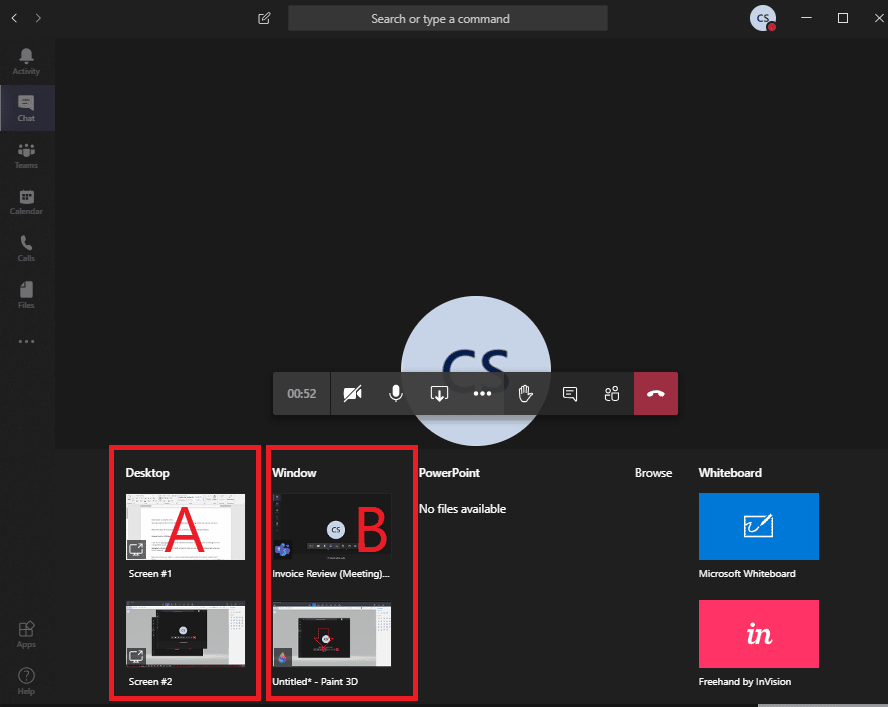
- From your Microsoft Teams meeting (instructions for this above), move your mouse around on the screen and your settings buttons will appear. Click the “Share” button (next to the microphone on/off button). The share button is a rectangle with an arrow.

2. You will have several options for sharing:
-
- Your entire screen. (This is easiest. If you have more than one screen, as pictured below, you can select 1 of them.)
- One of your open windows. (This allows for more privacy.)
- More options that can be explored here.
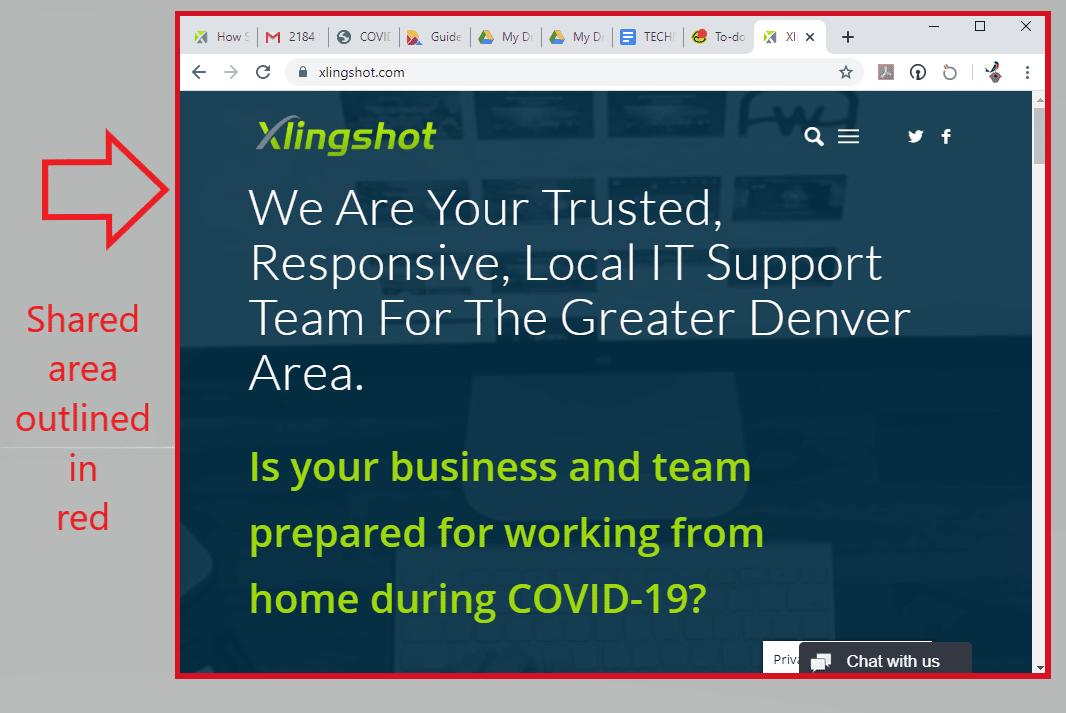
3. Screen sharing will usually take a moment to activate. The area that is being shared will be outlined in a red box. In the image below, I am sharing my Google Chrome Window and it is outlined in red to indicate that none of my other windows are being shared.
4. When you want to stop sharing your screen, move your mouse around so that the “call in progress” box shows up in the bottom right corner of your main screen. Click the “Stop Sharing” button, which looks like a rectangle with an X.

That’s it! Pretty simple, right? If you want to explore other options with screen sharing in Microsoft Teams, click here.
Now you should be able to schedule a virtual meeting and share your screen to give a live presentation. The content is up to you.
Did you find what you were looking for? We would love to hear what you think!
At AccountabilIT, we have over 17 years’ experience providing technical support, consultation, and Virtual CIO services to small and medium businesses, tailored to the needs and budget of each client.
AccountabilIT is one of many organizations that relies on Teams every day to stay connected. Would your organization benefit from implementing Microsoft Teams and other Office 365 products? Teams are very powerful as a solution and can be a bit overwhelming to fully implement. We can help you get set up and with your ongoing support needs. Contact us to learn more.
If you enjoyed this article and found it helpful, we will be writing more content around Microsoft Teams, subscribe to our newsletter to get the latest news and tips.