Connectors in MS Teams are a very useful function but few users know about them. You can use connectors to sync updates and data into the chat stream in Teams from other services that your organization subscribes to, such as Trello, Wundlist, GitHub, and Azure DevOps. You can also set up connectors to sync data from your other Office 365 programs into the chat stream.
For example, we have a client who wanted to set up automated updates between the sales team and the accounting team when new clients are signed. They created a connector to forward all email notifications that a new contract has been signed into the accounting channel in Teams. They could have set up the email forward to go from one email inbox to another, but having the data sync into Teams allows the accounting staff to simply check the channel chat stream when they are doing invoicing, rather than taking and filing email updates as they come in. By using the email connector in Teams, contract updates are automatically filled in the appropriate place as soon as the notification email comes in. That way, nothing is lost due to human error.
As long as team permissions allow (these are set up by the team admin), all team members can set up connectors to sync with their cloud services so that when new information comes in, all team members are notified. The connector is not dependent on the person who sets it up, this means that when that person leaves the organization, the connector stays in place. All team members with the permissions to add or remove items in Teams can edit connectors created by other team members.
How to add a Connector to a Channel
At this time, you cannot create connectors in the mobile version of Teams, it has to be on Microsoft Teams desktop and web.
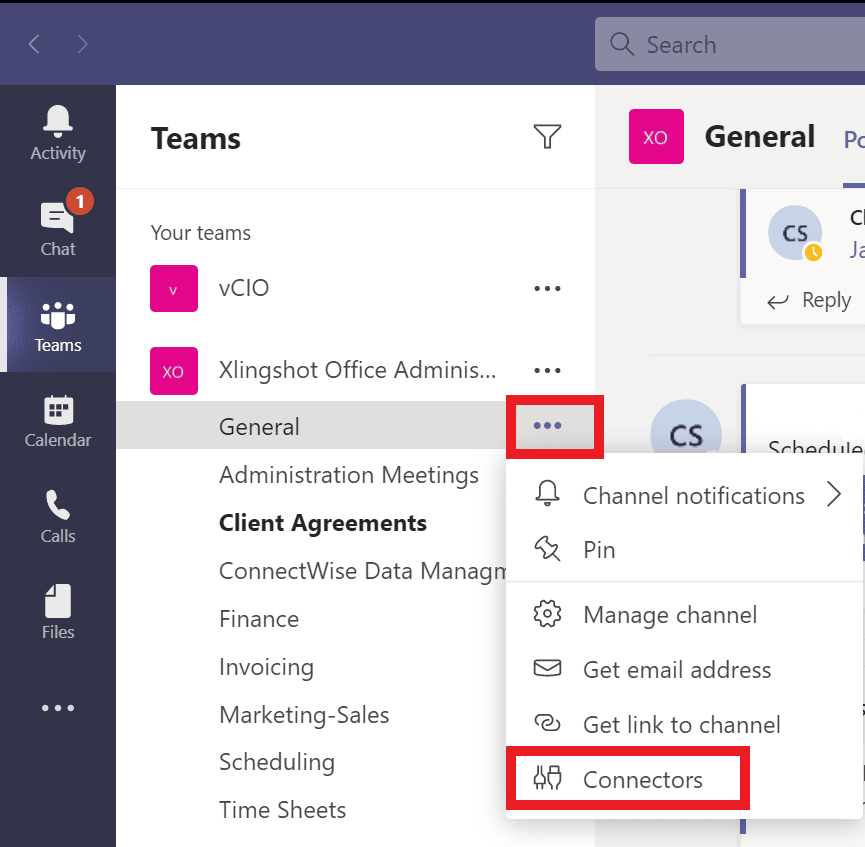
- First, click on in Teams button on the far left, select the Team and Channel where you wish to add a connector. Click on the ellipses (3 dots) next to the channel where you want to make the addition and select Connectors from the drop-down menu.
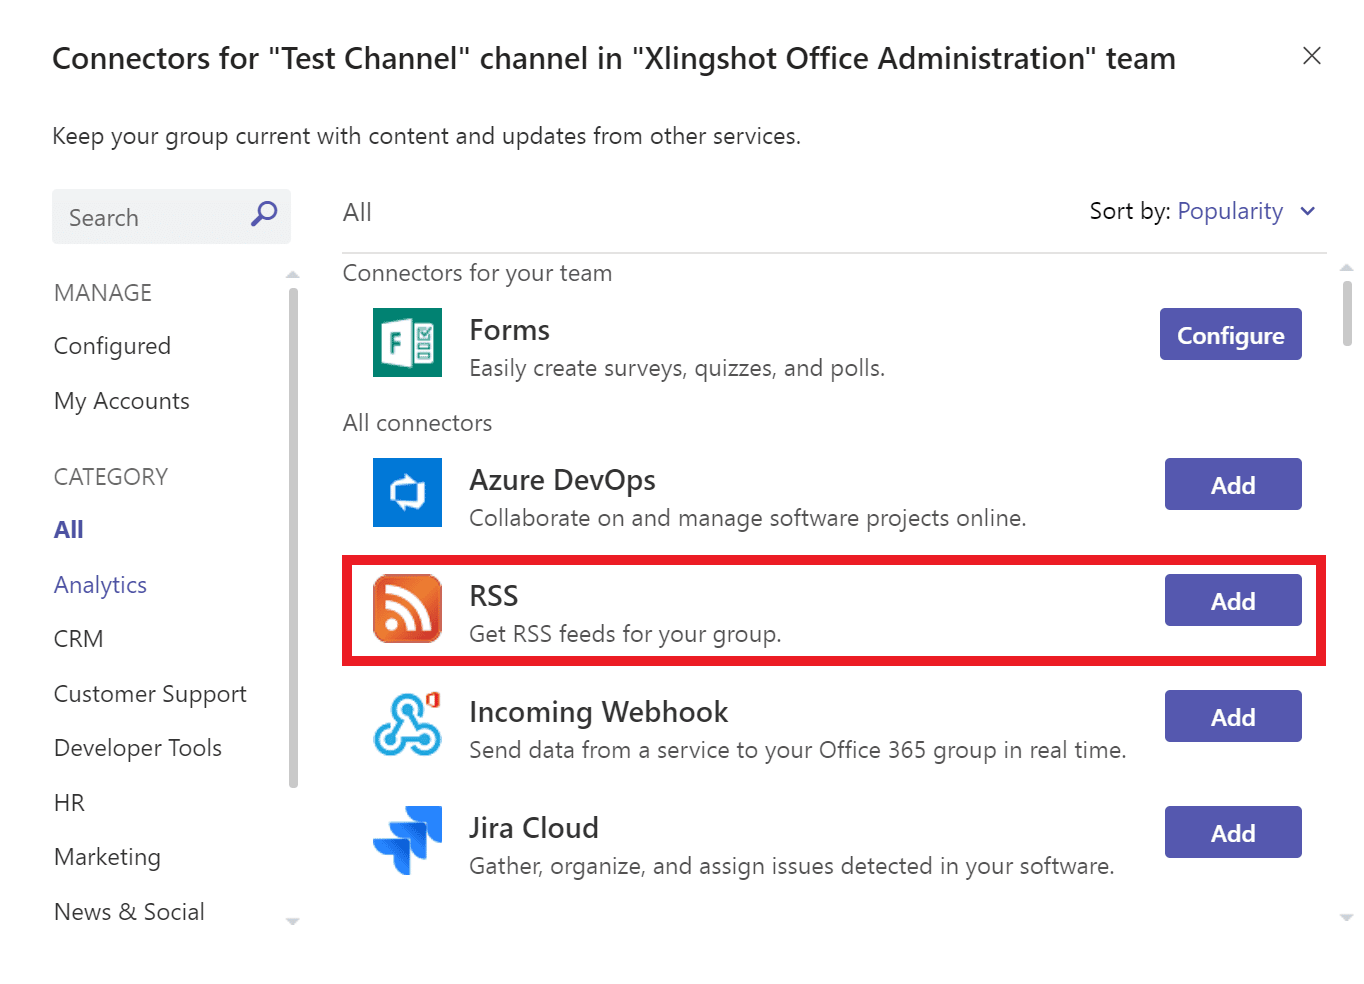
- A variety of connector options will appear. In this example, the user is adding an RSS connector to the channel.
3. Depending on which connector you are setting up, there is a variety of information that you may need to provide. (For example, if you are linking to a service that requires a sign in then you will have to provide the login information.) After you have filled in the required information, click Save.
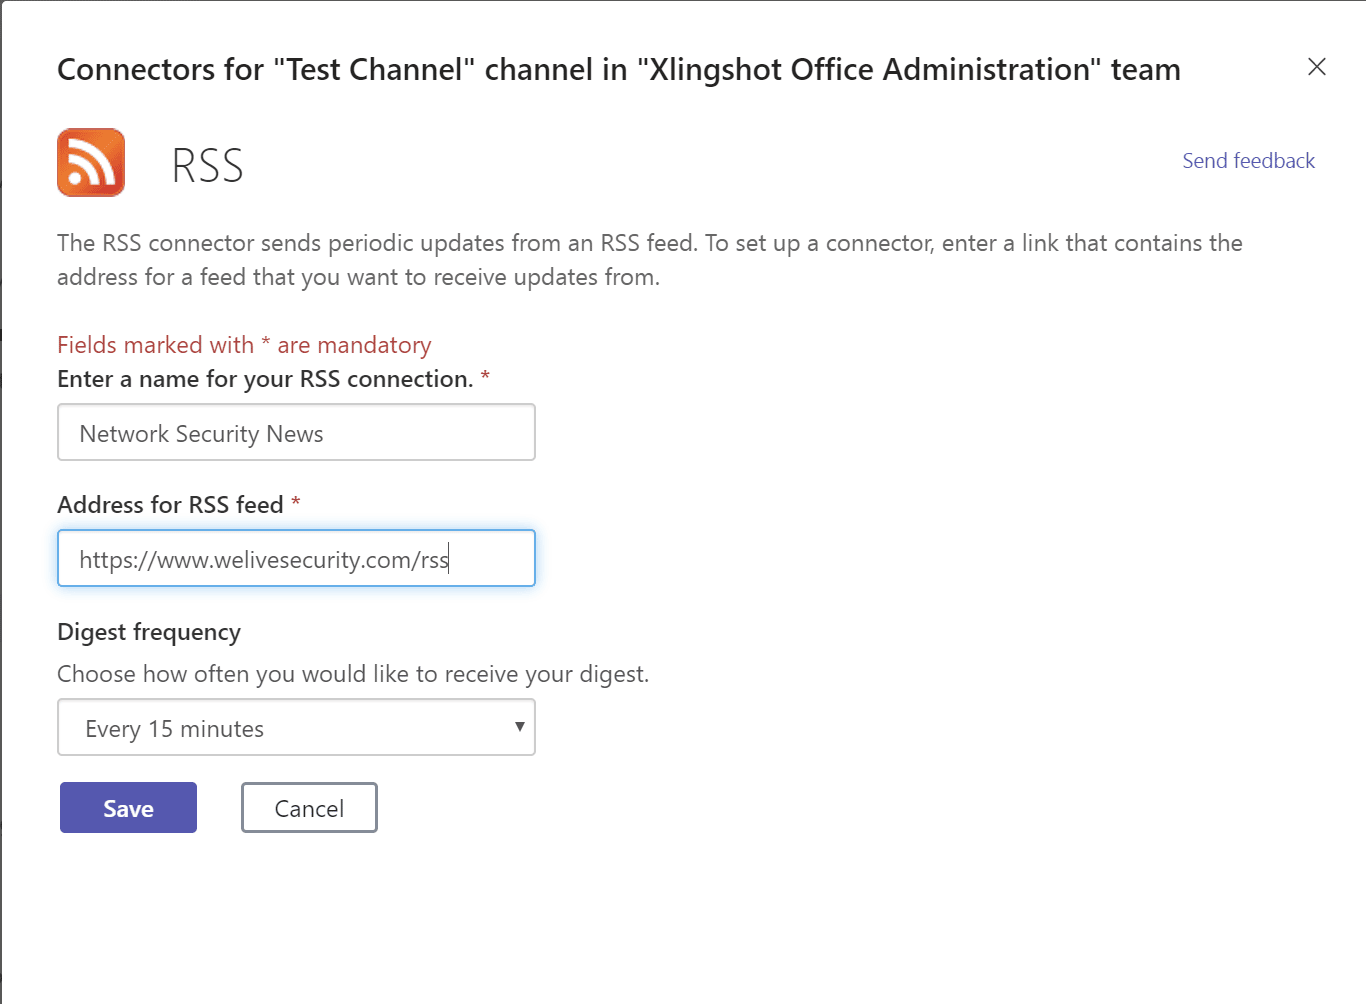
4. The connector data that you have set up will show up in the feed, refreshing based on the settings that you filled in on the previous pop-up page. (In the sample it is set to refresh every 15 minutes.)
Create Custom Connectors
Once you have learned the basics of creating connectors, you can branch out into custom connectors. For more information on this, see the developer information that Microsoft has put together. You can also access additional online training videos here. Enjoy!
Looking for additional IT support?
AccountabilIT is a proud Microsoft partner with 18+ years of experience providing Network Security, Security Awareness Training, Virtual CIO services, and daily IT support to small and medium businesses and organizations.
Our approach to delivering the best possible IT service is centered on you. For a free consultation please contact us today.
We know what it’s like to run a business and we know your time is valuable. We can:
- learn about your business
- give you some ideas on what improvements you can make right away
- provide free advice on your approach to IT solutions
And if you’d like, we can show you where and how we can help. Call 866-950-0699 for a complimentary consultation.